To submit an Application Form, you must have an e-id account. You may find the specific documentation required for the Application Form which will be submitted, by clicking the “Click here to apply” link of the specific Application Form.

This will redirect you to the Pre-Requisites page for the Application chosen.
You can register for the e-ID credentials via this link https://onlineportal.landsauthority.org.mt/User/eIDLogin
To login using your e-ID, hover the mouse over the “Sign In” icon at the top right and click “Sign In”. The e-ID login screen is prompted. Enter your e-ID credentials and click “Sign In”.

Once logged in, your ID card is visible, indicating that you are logged in.

This usually happens when a user is automatically logged out after a period of inactivity. Hover the mouse over the “Sign In” icon at the top right and click “Sign In”, after the session expires and proceed to log in again.
Only Forms LC1 and Agri1 can be submitted on behalf of someone else. LC1 can be submitted by an appointed representative and AGRI1 can be submitted by a third party filling the application for the applicant. Forms PLA1, PLA2 and GLA12 must be submitted by a Perit.
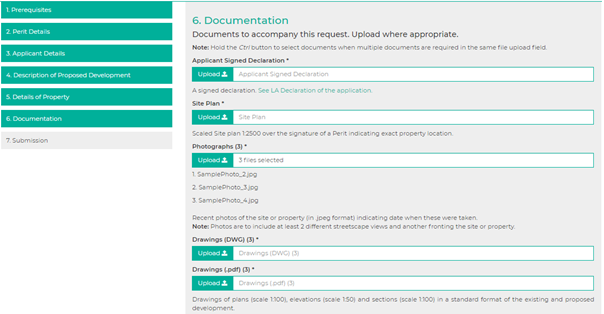
This happens when more than one file is required to be uploaded in the same file upload field, such as photographs. In order to upload multiple files/documents:
⦁ Click the Upload button.
⦁ Locate the files/documents on your personal computer (pc).
⦁ Hold the CTRL button (on keyboard).
⦁ Select all the required files/documents.
⦁ Click the Upload button.
⦁ Locate the files/documents on your personal computer (pc).
⦁ Hold the CTRL button (on keyboard).
⦁ Select all the required files/documents.
To upload the correct file(s)/document(s), click the “Upload” button of the file upload field for which you need to upload the correct file(s)/document(s) and select the correct file(s)/document(s).
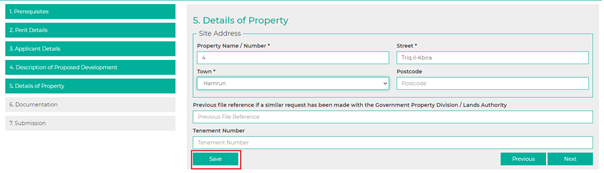
You can save an application prior to the “Documentation” section by clicking the “Save” button.

The application is saved and a message is prompted at the top of the page.

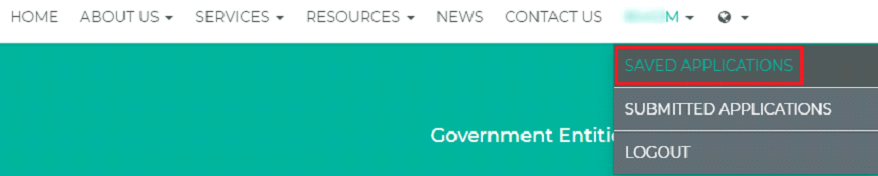
⦁ Hover the mouse over the ID Card.
⦁ Select “Saved Applications” option from the menu.
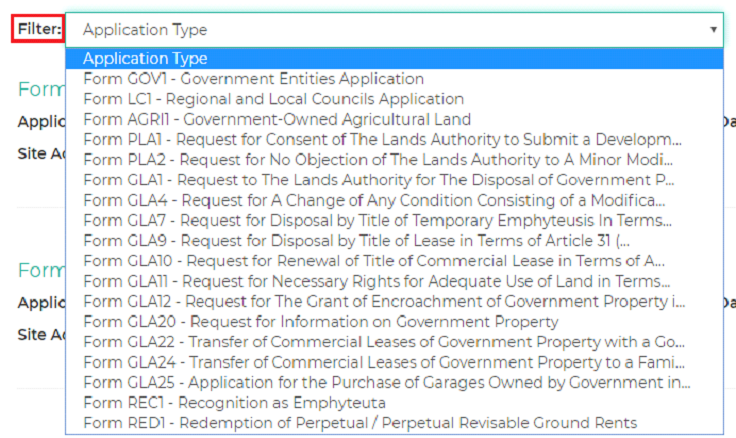
The list of saved applications prompts. You may also filter the list using the filter dropdown menu at the top of the page should you have more than one saved application.
⦁ Click on the link of the saved application you wish to submit.

⦁ The application takes you through all the steps to allow you to review the filled in information. Click the “Next” button to continue with the application. You may amend any information you deem necessary.
⦁ Upload the requested file(s)/document(s) and continue with submitting your application.
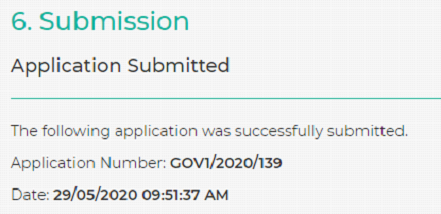
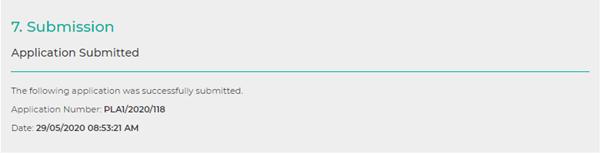
Once the application is submitted, you will be prompted with an acknowledgement including the application number. You will also receive an acknowledgement via email with a copy of the application (files/documents uploaded are not included in the email).
Should this error occur, kindly contact customer care on either the following email address [email protected] or telephone numbers 22953000; 21224016; to be guided accordingly. Kindly supply customer care with the following information:
⦁ The application being submitted (such as AGRI1).
⦁ Which browser is being used (such as Google Chrome, Firefox)
⦁ Which device is being used (such as home pc or laptop, mobile device)
⦁ At which step was the error prompted (such as Documentation step, Submission step).
Certain applications may require payment upfront during the submission process. Currently this is only applicable to GLA25 application (Garage Scheme)
⦁ Once at the payment step, enter all the payment details and read the terms and conditions.
⦁ Click “Continue” to affect the payment.

Once the payment is affected, you will be prompted with an acknowledgement including the application number. You will also receive an acknowledgement via email with a copy of the application (files/documents uploaded are not included in the email) as well as a payment receipt via email.
⦁ Hover the mouse over the ID Card.
⦁ Select “Submitted Applications” option from the menu.

The list of submitted applications prompts. By default, applications awaiting your feedback are automatically prompted. You may also filter the list using the filter menu at the top of the page should you have more than one submitted application.

You may filter by Application Number or by the Status of applications and the list of applications loads accordingly.

You will be notified via email should any of the uploaded documentation needs rectification. It is important to note that you have 30 calendar days to submit the requested information. The application will be closed, should no feedback is submitted from your end, in which case you will receive an email notification that the application has been closed.
- Login with your e-ID.
- Click “Submitted Application” from the menu.
- Locate the application and click on the link to open the “Amend Application” screen.
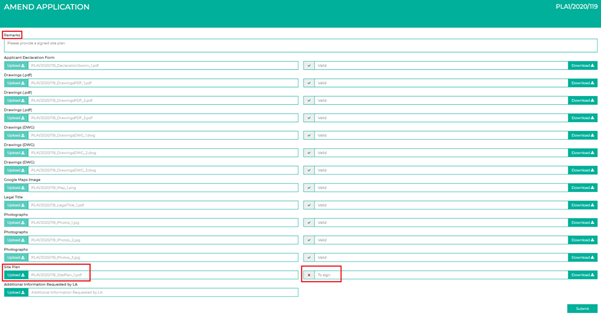
- Review the remarks and comments as indicated above.
- You may also download the file which is flagged as incorrect by clicking the “Download” button next to the file.
- Re-upload the correct file(s)/document(s) by clicking the “Upload” button for the incorrect document.
- Click the Submit button to submit the correct file(s)/document(s).
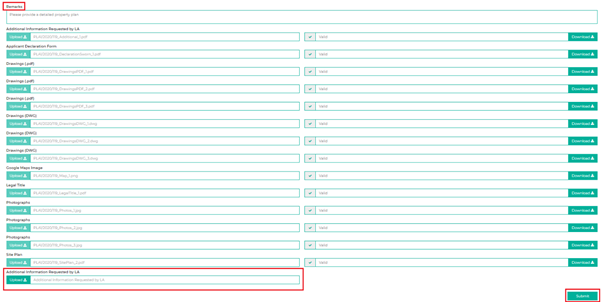
You may also be requested to submit additional documents (other than those submitted in the application. You may upload these file(s) using the “Additional Information Requested by LA” file upload field at the bottom.
- Click the “Upload” button to upload the file(s)/document(s) requested.
- Click the Submit button to submit the file(s)/document(s).
No, the acknowledgement does not mean that the application is being processed. Once the application is being processed, you will receive another email informing you that your application has been vetted and is now validated for processing.
You will be notified via email should LA needs further information other than that submitted in the application.
- Login with your e-ID.
- Click “Submitted Application” from the menu.
- Locate the application and click on the link to open the “Amend Application” screen.
You may upload these file(s) using the “Additional Information Requested by LA” file upload field at the bottom.
- Click the “Upload” button to upload the file(s)/document(s) requested.
- Click the Submit button to submit the file(s)/document(s).
No, all applications and documentation must be submitted via the LA portal. It is very important to note that emails you receive are automated messages, therefore you cannot reply or send any messages to the said email address.
Kindly contact customer care on the following email address [email protected]. please include you details together with your warrant number in the email.
Delegates are person/s authorised to fill in an application on behalf of someone else.
- Login using your e-ID credentials (once logged in, your ID card is visible, indicating that you are logged in).
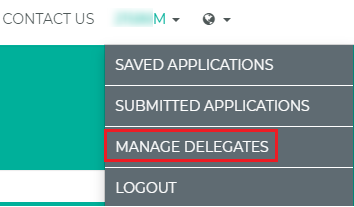
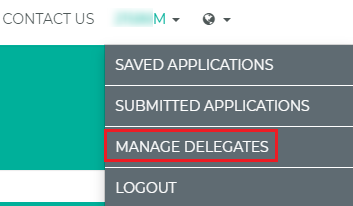
- Click on the ID Card No and the menu opens.
- Select “Manage Delegates” option from the menu.
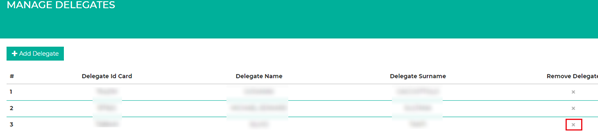
The list of active delegates is populated.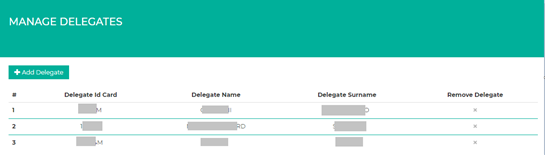
- Click the “Add Delegate” button to add a new delegate.

- Enter the Id Card and Date of Birth of the person you wish to add as your delegate.
- Click the “Search” button.
- Details of the delegate (Name and Surname) are retrieved if there is a match with details you entered.
- Click the “Upload” button to browse for the Delegate consent form duly filled in and upload it.
- Click the “Add Delegate” button to create the Delegate.
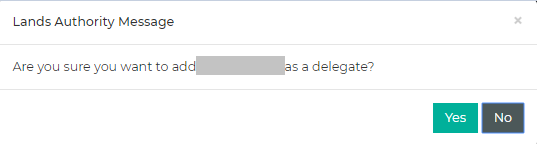
- Confirm the dialog box by clicking “Yes”.
The new added delegate will be included in the list of active delegates once confirmed.
- Login using your e-ID credentials (once logged in, your ID card is visible, indicating that you are logged in).
- Click on the ID Card No and the menu opens.
- Select “Manage Delegates” option from the menu.
The list of active delegates is populated. - Click the Remove Icon next to the Delegate you wish to remove.
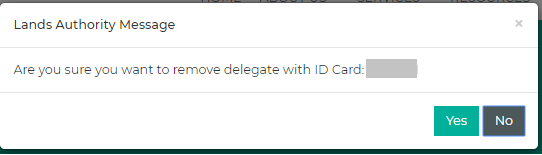
- Confirm removal of Delegate by clicking “Yes”.
Access to the submitted applications by the Delegate on behalf of the Perit is immediately revoked once the removal is confirmed.
Yes, multiple delegates may be added. Please refer to the “How to add a Delegate” section to add delegates.
- Login using your e-ID credentials (once logged in, your ID card is visible, indicating that you are logged in).
- If it is the first time, you will be asked to confirm details and update any missing details. By default, details are automatically populated from e-ID however, you can change the email address and Address. As a Delegate, you are allowed to submit applications which are usually submitted only by a Perit.
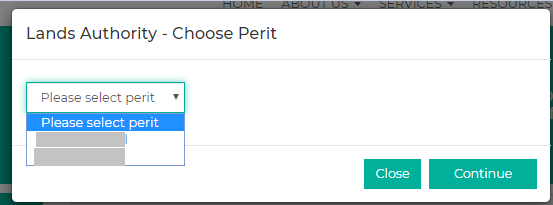
- If as a Delegate you are also a Perit or a delegate of more than one Perit, you will be asked to choose on behalf of which Perit you are submitting the application.
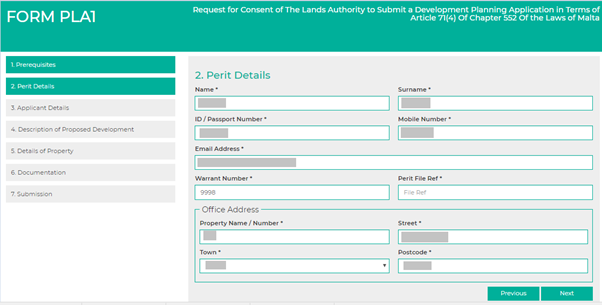
Perit details are automatically populated.
- If it is the first time, you will be asked to confirm details and update any missing details. By default, details are automatically populated from e-ID however, you can change the email address and Address. As a Delegate, you are allowed to submit applications which are usually submitted only by a Perit.
- Click the “Click Here To Apply” link for the application you wish to submit
- Click the “Click Here To Apply” link for the application you wish to submit
- Perit Details are automatically filled in.
- Clicking Next will take you to the following step in the Application Process.
- Click the “Save” button prior to the “Documentation” step to save your application as draft.
- As a Delegate you can save applications and retrieve them when selecting the “Saved Applications” option found under the menu prompted when clicking the ID Card.
- As a Delegate you can save applications and retrieve them when selecting the “Saved Applications” option found under the menu prompted when clicking the ID Card.
- Upload the necessary documentation in the relevant tab as per below (fields marked with an asterisk [*] are mandatory.
- Click “Next” to submit your Application.
- Upon successful submission, an Acknowledgement specifying the Application Number is displayed and a copy of the application (Details only no files) is sent via email.
Any correspondence will be sent by email to both the delegate and the Perit.
Yes, different Periti may add the same person as their delegate.
Periti can view the Applications submitted on their behalf by their Delegates, by selecting the “Submitted Applications” option found under the menu prompted when clicking the ID Card.
No, an application which is still in progress by your Delegate, may not be viewed until the application is submitted by your delegate.